LoreBox Manual
A walk through the basics, following screenshots of the real app. If you haven't installed it yet, start from the download page.
The screenshots use sample data and show the free version in its Japanese UI. LoreBox also has an English UI.
Launch LoreBox
When you launch LoreBox for the first time, it shows that no working folder has been registered yet. From the card in the middle, choose “Choose working folder” to start fresh, or “Restore from backup” to bring back earlier work. You can switch the language (Japanese / EN) and the display theme (follow system / light / dark) at any time from the buttons at the top right.
Choose a working folder
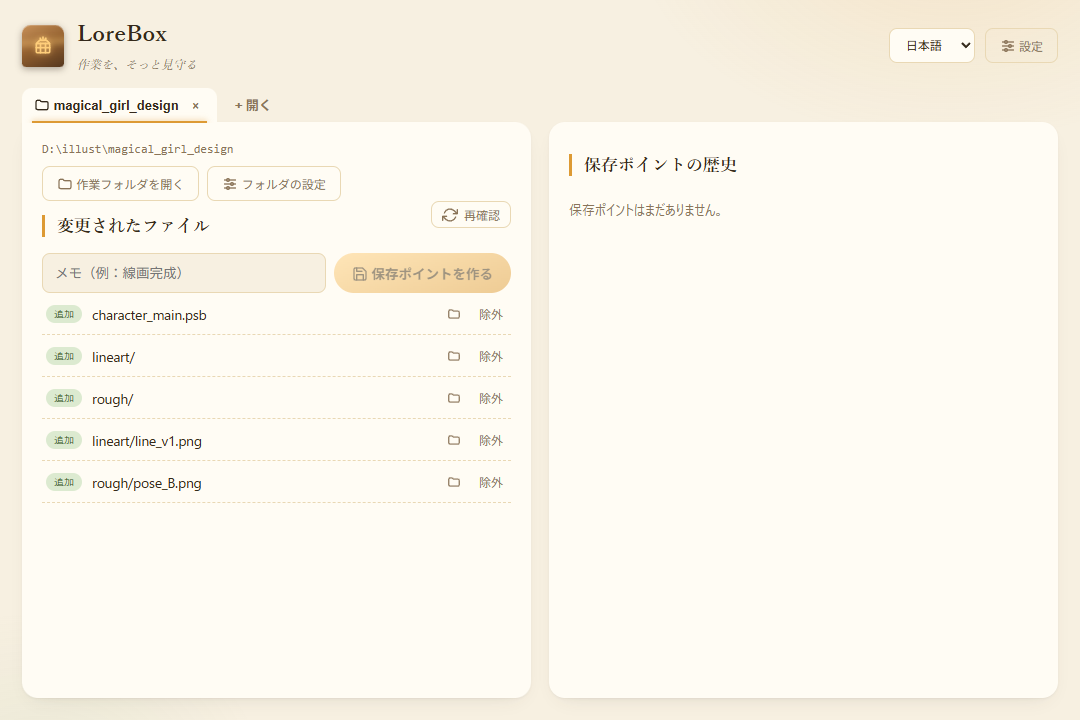
Use the “Choose working folder” button to pick the folder that holds your creative files. The folder opens as a tab, and LoreBox automatically detects files that are added, changed, or deleted. At the top left of the screen are the location of the open folder and the buttons “Open working folder” (shows it in Explorer or Finder) and “Folder settings”.
💡 The free version can open only one working folder at a time. Managing several folders in tabs is a paid feature, available with a license.
Check the changed files
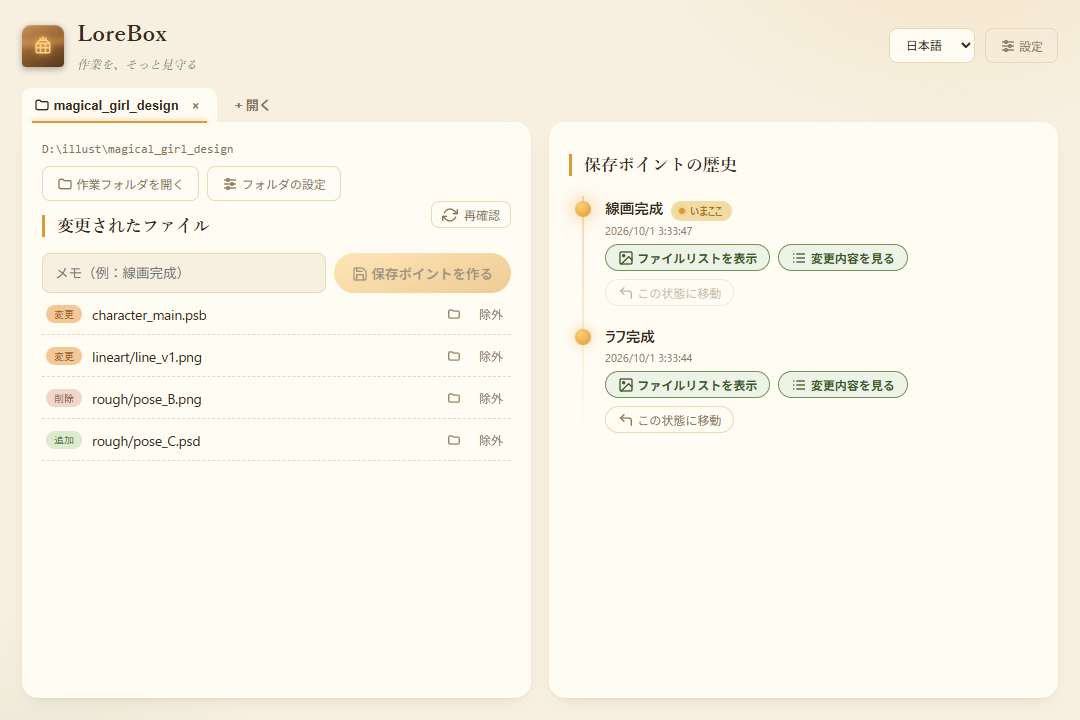
“Changed files” on the left lists the files that have changed since the last save point. They are color-coded so you can tell “changed”, “added”, and “deleted” at a glance. The folder icon opens the file's location. Press “Exclude” to leave a file out of future lists and save points (you can undo an exclusion at any time in the folder settings). To check the whole folder again, press “Recheck”.
Create a save point
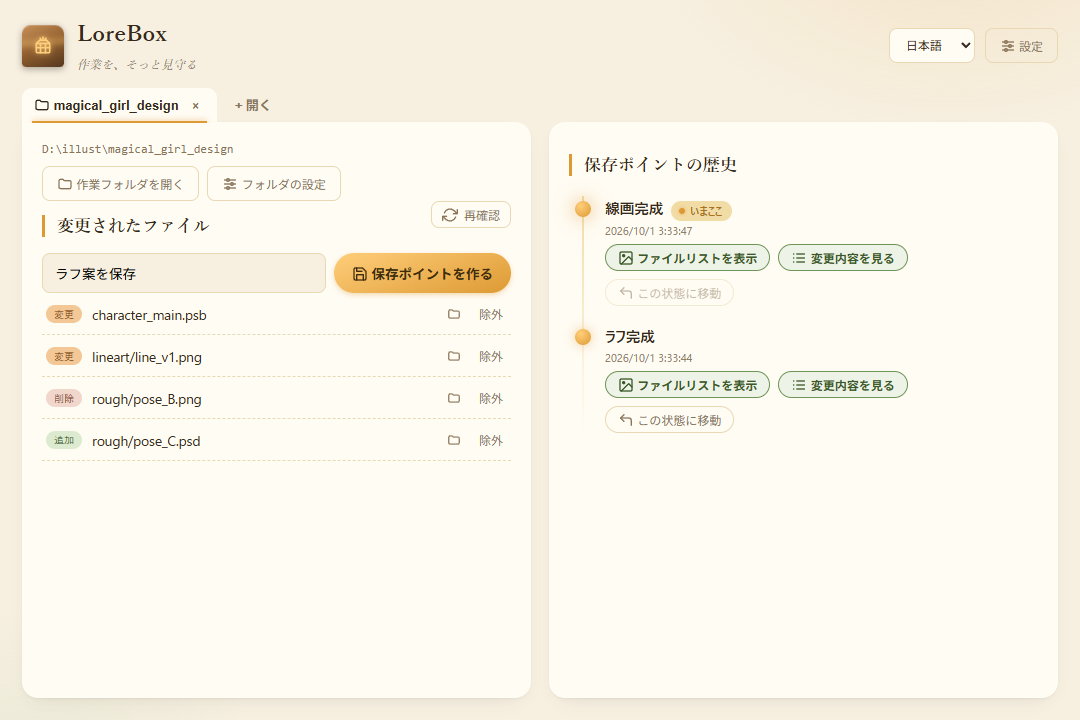
Type a short note such as “line art done” in the note field and press “Create save point”, and the current state is recorded. When it is done, a notice appears at the bottom of the screen and the save point is added to the history on the right. If it takes a long time for a large folder, you can stop it with “Cancel”.
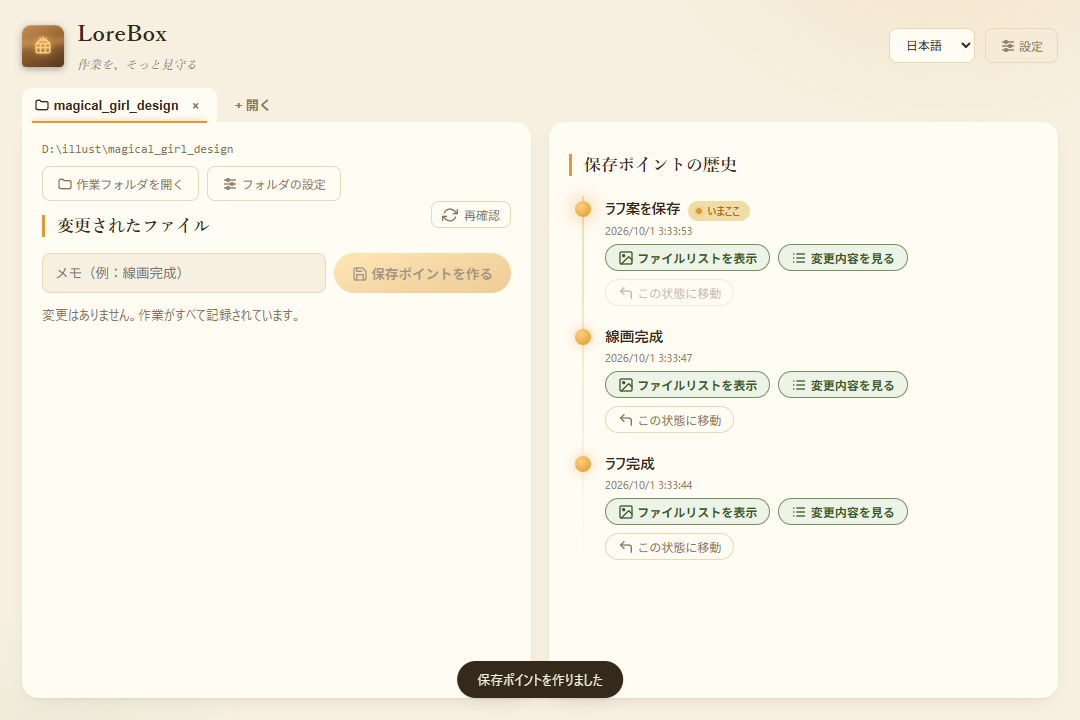
💡 To save without a note, turn off “Require a note when creating a save point” in the settings. Automatic save points (which save unsaved changes every 30 minutes) are a paid feature, available with a license.
Look back and restore from the history
Each save point you create is stacked in the “Save point history” in the middle, newest first. A “You are here” mark shows which save point your current work corresponds to. Select a row in the history to see that save point’s details on the right.
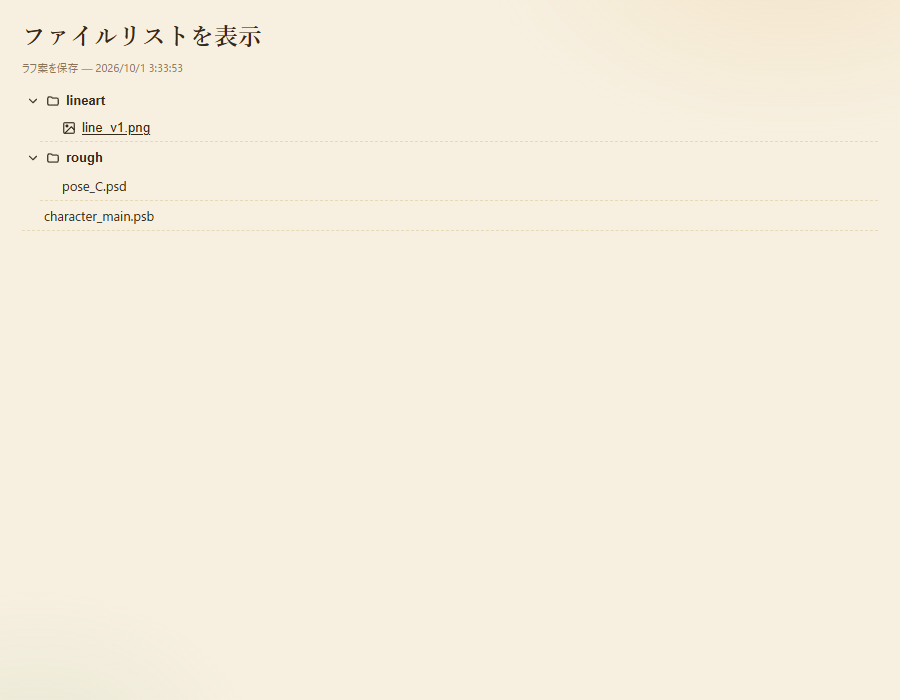
- Changes / Files: Tabs in the details that switch between the files changed in that save point and the files as they were at that point. Images can be previewed in place.
- Open in window: Opens “View changes” in a separate window, showing which files changed and how (the image above).
- Move to this state: Puts your working folder in the state of that save point. Moving does not erase the history. At the current position it shows “You are here”.
If your current work has unsaved changes, you can choose “Discard and move”, “Merge and move”, or “Save and move” before you move. While you are on a past save point you cannot create a new one, so press “Return to latest” on the screen first, and then save.
Open the app settings
Open “Settings” at the top right to switch between the “App settings”, “Cloud storage”, “Plugin settings”, and “Backup history” tabs. In “App settings”, you can set the license, launching at PC startup, keeping the app in the taskbar, what the × button does, save point settings, and exclusion patterns, each in its own card.
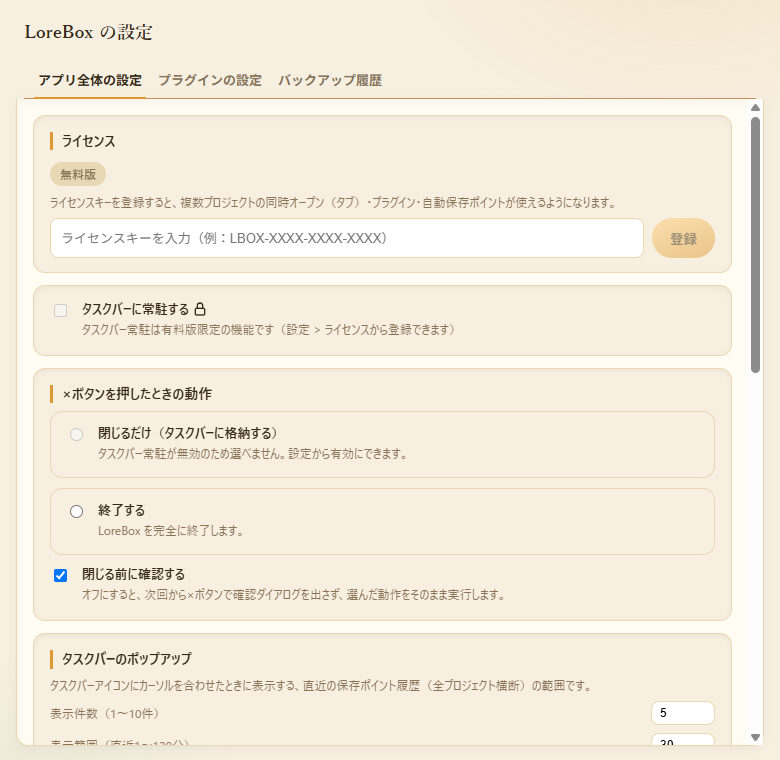
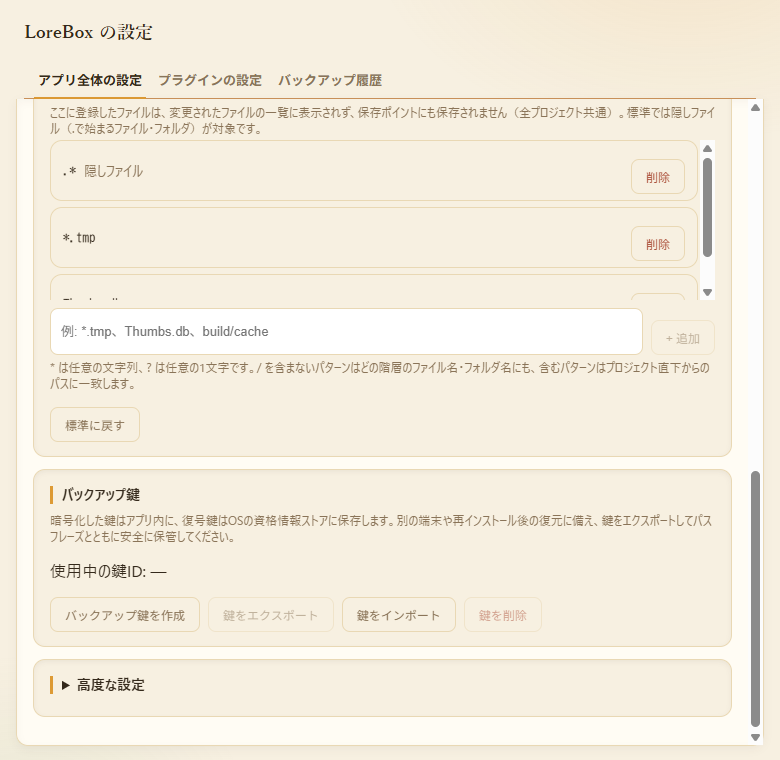
- Save point settings: Choose whether a note is required, and whether unsaved changes are saved as a save point automatically when a backup starts.
- Hide from changed files: Exclusion patterns for all folders. By default, hidden files that start with “.” are excluded, along with
*.tmpandThumbs.db. You can add your own, such asbuild/cache. - Backup key: On the “Cloud storage” tab, create the key used for encrypted backups, show and restore it with a recovery phrase, export and import a key file, or delete the key (see below).
Open the folder settings
“Folder settings” at the top of the workspace opens settings for that folder only, in a separate window. Backups and integrity checks are here too.
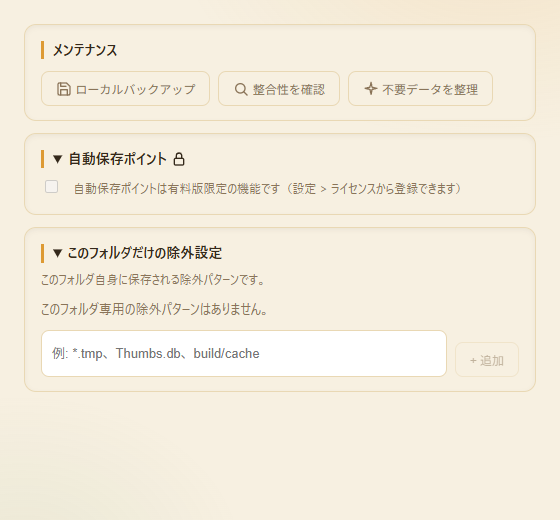
- Maintenance: Run “Local backup”, “Check integrity”, and “Clean up unused data”.
- Automatic save points: Automatically saves unsaved changes every 30 minutes (a paid feature).
- Exclusions for this folder only: Add or remove exclusion patterns that apply only to this folder.
Use past versions
The save point history is not only for looking back; you can also bring past work back into what you are doing now. None of these operations rewrites the history, and the results of a copy or restore show up as unsaved changes, so you can check them before you make a save point.
- Search: Use the search box at the top of the history to find save points. “Filters” lets you narrow by period (From / To), file name, “Show automatic save points”, and “Marked only”. Runs of automatic save points are folded into “Show N automatic save points”.
- Mark and note: From “Mark and note” on each history row, you can add a mark (“Final”, “Delivered”, or “Favorite”) and a note of up to 200 characters. Marks and notes are stored only inside that folder and are not sent to the history or to backup destinations.
- History of a file: Select a file in a save point to open “Overview”, “History”, and “Compare”. “History” follows only the save points where that file changed, newest first, and also shows the version before a deletion or a possible rename.
- Open a past version: “Open this version” opens a past version as a read-only temporary file in the app associated with it. If you edit and save it there, the change is not applied to your working folder.
- Copy to latest: “Copy to latest” writes the contents of that version back into your working folder (no save point is created yet). If a file with different contents already exists, choose “Replace it” or “Keep both (new name)”. Right afterward you can undo it with “Undo”. “Select several files to import into latest” brings in multiple files or folders (1 to 200) at once.
- Compare: “Compare with previous” shows the difference from the previous save point. Images can be shown as a slider, side by side, or stacked. Text shows the lines that were added and removed. For other files, “Open both versions” opens the previous and current versions together.
- Restore this state as the latest: Select a save point and choose this from “More actions” to write your working folder back to the contents of that point. Check the files that will be added, changed, or deleted, press “Restore”, and, if the result looks right, press “Confirm as latest” to add it to the end of the history as a new save point. If you have unsaved changes, choose “Save first, then restore” or “Set changes aside and continue”. Until you confirm, you can undo the restore.
💡 “Move to this state” is for temporarily viewing or editing a past state. When you want to roll back and make that state the new latest version, use “Restore this state as the latest”.
License and plugins
Paid features (multiple folders in tabs, automatic save points, keeping the app in the taskbar, plugins, and more) become available when you enter a license key under “License” in the app settings and press “Register”. A license is a one-time purchase and can be registered on up to 3 devices. Paid features are available with a license.
- Checking your license: “Validate license” checks whether it is valid now. When you cannot connect to the network, paid features keep working during the grace period. Connect to the network to refresh your license before the grace period ends.
- Registered devices: The devices you have registered are listed, and you can remove one you no longer use with “Remove”.
- If you lose your key: Open “Lost your license key? (Reissue)” and press “Send confirmation code” to have a confirmation code (valid for 30 minutes) sent to your purchase email address. Paste the code and press “Issue a new key and register” to get a new key. The old key stops working.
- Refunds: Within 14 days of purchase, you can request a full refund for any reason from “Request a refund”. Confirm it is you with the confirmation code sent to your purchase email address, then press “Refund”. After a refund, the license becomes invalid and LoreBox switches to the free version. You can keep using the files in your working folder as before.
- Contact: Write to support@lorebox.net. Please give us the “Support ID” shown in the License section, not your license key. Never share your license key.
Plugins add features to LoreBox (a paid feature). Under “Plugin settings” in the settings, choose “Install official plugin (ZIP)” to install a signed plugin that the LoreBox project distributes officially. For cloud backup, there are currently plugins for Google Drive, Dropbox, Box, and OneDrive.
Download the official plugin files (ZIP) below, then choose the downloaded file with “Install official plugin (ZIP)”.
Dropbox plugins are coming soon.
Backup and restore
⚠️ The backup key is the lifeline of your backups. Backups are encrypted with this key. Without it, nobody can restore them. The key exists only on your device, and the LoreBox project does not hold it and cannot recover it. To prepare for a failed PC, a replacement, or a reinstall, keep one of the following (ideally both) somewhere else before you create backups.
- Recovery phrase (36 words): The key itself. If you keep it in a password manager such as 1Password, you can bring the key back on another PC without any file.
- Key file: The key protected by a passphrase. Keep it separately from the passphrase.
Anyone who gets the phrase or the key file can decrypt your backups. Do not paste them into chats or emails.
Create the key and keep the phrase and key file
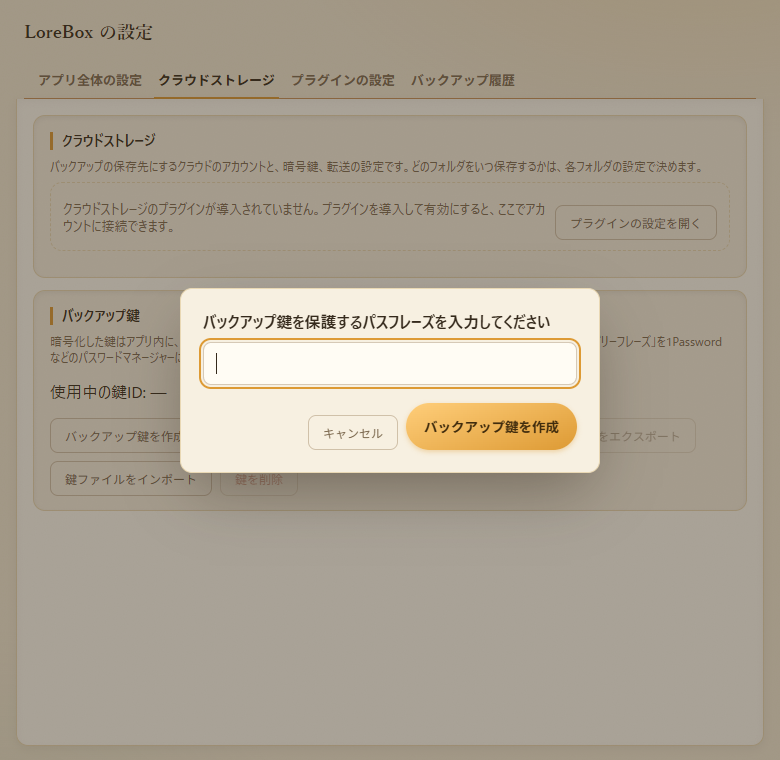
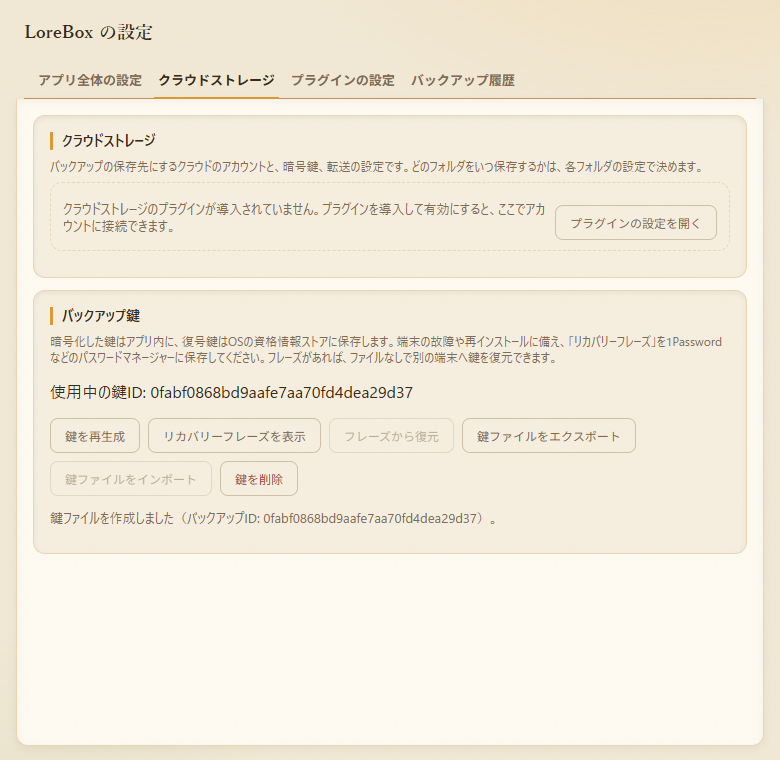
- Open the “Cloud storage” tab in the settings and press “Create backup key” under “Backup key”.
- Choose the passphrase that protects the key on this PC (use a long one that you do not use elsewhere).
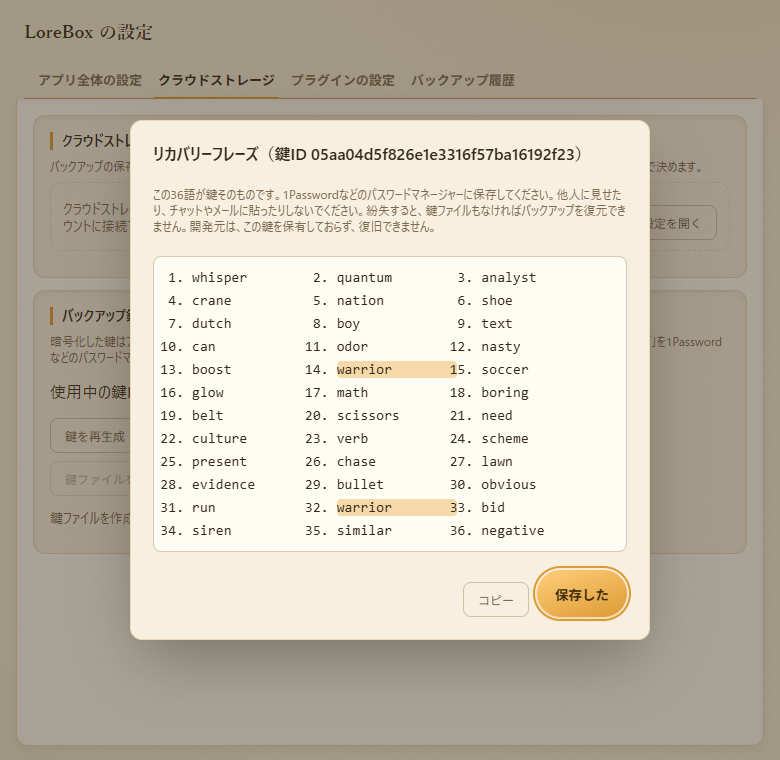
- Right after you create it, the recovery phrase (36 words) is shown. Save it to your password manager with “Copy”, then press “I saved it”. When the same word appears more than once, it is shown in the same color, which helps when you copy the phrase by hand. You can also see the phrase later with “Show recovery phrase”.
- Next, press “Export key file”, choose where to save, and write out the key file. Keep it somewhere other than this PC, such as an external drive or an attachment in your password manager.
Bring the key back on another PC (or after a reinstall)
- From the phrase: Press “Restore from phrase” to open 36 numbered boxes. Enter your saved 36 words one by one, in numbered order (typing a space moves to the next box). If you paste the copied phrase into any box, it is spread over the 36 boxes automatically. Spaces, line breaks, commas, hyphens, or numbers as separators, and mixed upper and lower case, are all accepted. A box turns red if the word is not in the word list, and “Enter” becomes available once all 36 words are in. Then choose a new passphrase that protects the key on this PC.
- From the key file: Press “Import key file”, choose the file, and enter the passphrase you chose when you created the key or exported the key file (it is separate from the recovery phrase).
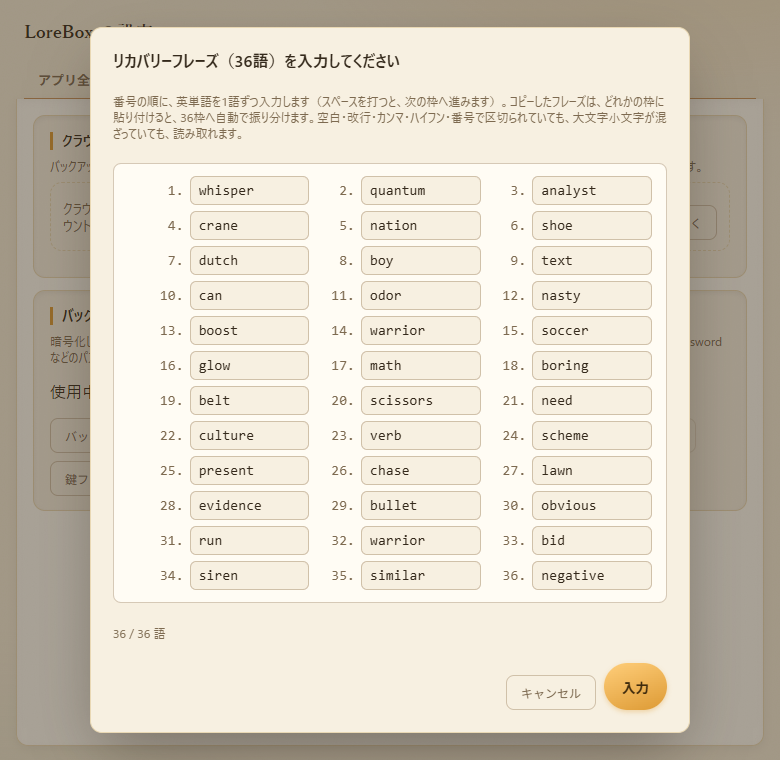
Once the key is back, restore a backup with “Restore from backup” on the first screen (see below). “Delete key” removes the key in use and returns to the “no key” state. A backup made with a key whose phrase and file you did not keep can never be restored, so a confirmation dialog appears twice, and the second one asks you to enter a number shown on the screen.
- Local backup: From “Local backup” in the folder settings, save the folder as one encrypted file on an external drive or elsewhere. Choose a location outside your working folder.
- Cloud backup (a paid feature): Install a cloud plugin, press “Connect” on the “Cloud storage” tab in the settings, and allow access to your account in the browser. After that, “Back up to cloud” in the folder settings saves encrypted data to an area reserved for the app. “Set up automatic cloud backups” schedules regular backups at an interval you choose. The number of past generations to keep (0 to 30) can be changed in the advanced settings of cloud storage. Only encrypted data reaches the cloud provider; the key never does.
- Restore from backup: On the first screen, choose “Restore from backup”, pick the backup and the key file, and restore the whole work history into an empty folder. For a cloud backup, use “Restore from cloud” and choose the source and the folder.
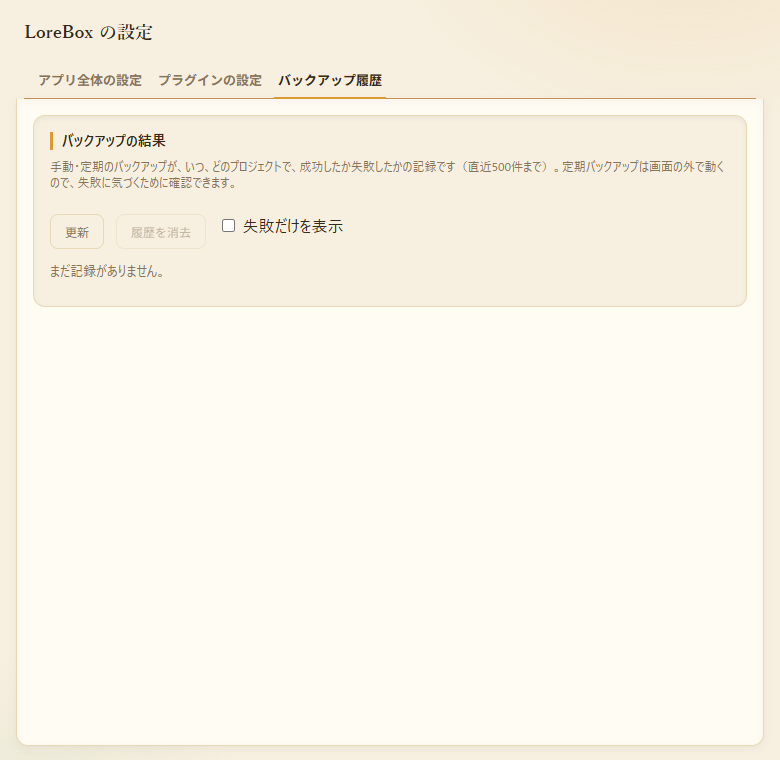
- Check the results: In “Backup history” in the settings, you can see when each backup succeeded or failed.
More features
Handy features that do not fit on the screens above.